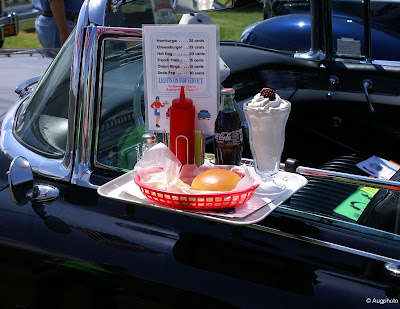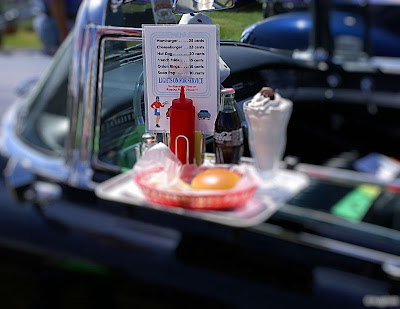
Here, I followed the 'Add Depth of Field to Your Photos' Tutorial at the Corel website. I must say, at the onset, that I was very disappointed. While, I welcome all other additions to the newest version (PSPP XI), This one just doesn't make the grade. Ironically, this is the one feature I was most looking forward to. If you use the default settings with this tool it is quick and very, easy. If you don't use the defaults, it becomes tedious, time-consuming, and sometimes frustrating. And usually v...e...r...y..., v...e...r...y... slooooow! The problem is, that the default settings can seldom be used. To truly get this effect right it must be customized to your individual image. With that out of the way, there may be some rare times when this tool would be useful. During these moments it may be appreciated.
As far as the tutorial goes, it is quite straight forward. Open your image and then open the Depth of Field Dialog Box. You the select your area of focus. This is where it starts to get tricky and this tool needs some refinement, here. Once you get your area selected there are a couple of controls you may use to refine the area and the effect. You may set the amount of blur and you have a couple of choices in the shape of your aperture. Also, you may feather your edge for this effect and finally, you may adjust the size of your selection.

I wanted to emphasis the menu in this photo. Adjusting the depth of field allows me to do so by throwing the other elements out of focus. I used to do this sort of effect manually in older versions of Paint Shop Pro and was looking forward to an easier way. Sadly, the new method is not easier and can actually be slower and more frustrating. Give it a try and you decide. Maybe you will have a better experience than I.


No comments:
Post a Comment