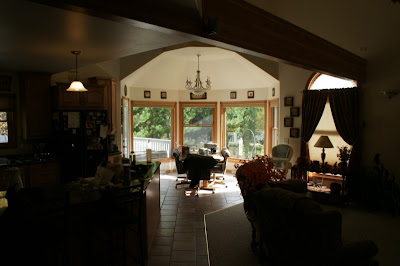
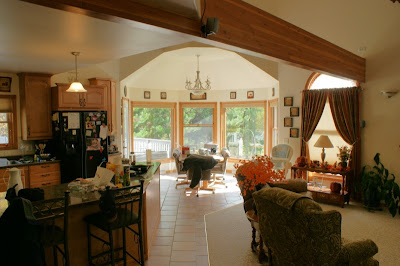
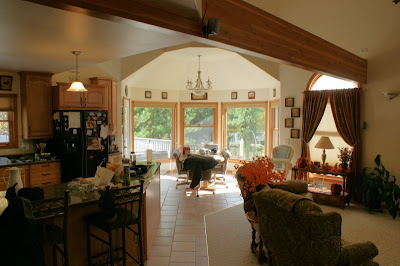
 I chose a typical indoor scene which usually spells trouble for the camera trying to obtain proper exposure across the whole range. The scene has one standing in an interior shooting towards a window with bright sunlight. The view is wide enough to include much of the interior surrounding and in front of the window. Predictably, if we expose for the sunlight the rest of the scene goes very dark, as shown in the first shot above.
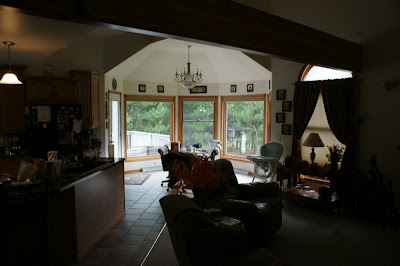 This was the first shot I took using the Optimizer and was meant to show how the scene would record using the camera's default value. Although, I thought this setting would be what the Sony labels (D-R) or the standard setting, somehow it wound up being (D-R+) or what Sony calls the Advanced Auto Setting.
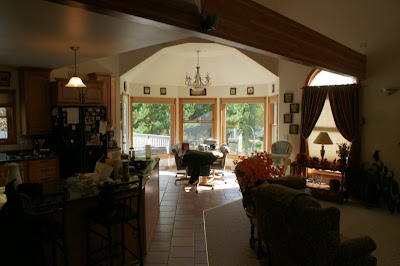
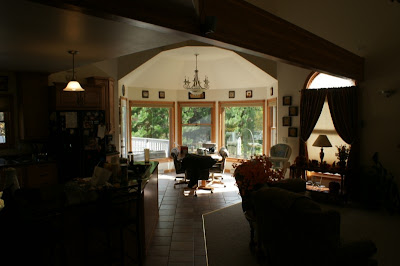 Later on, I figured out how to change the setting to standard or (D-R), which was very easy to do actually. And this setting is represented above.
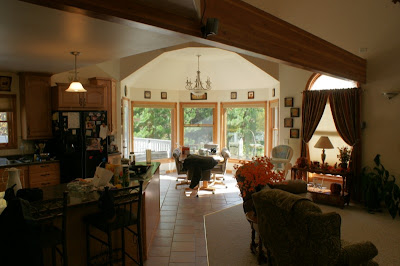
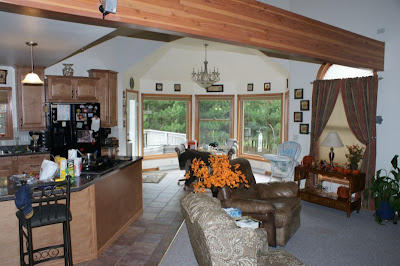 So then, for comparative purposes, I thought I would capture the scene using the camera's built-in flash and this is what we see here.
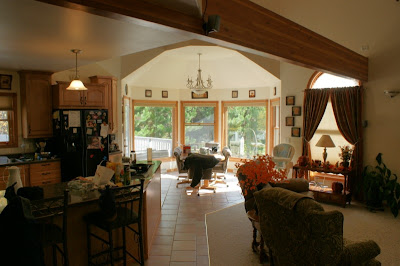
Now, on to the fun stuff. Sony's Advanced Level D-Range Optimization can be utilized through a five-step range, depending on the needs at the time.
 Here is Level 5, the highest setting.
I'll let everyone be their own judge here, as to the usefulness of this feature. It plainly did lighten up the shadows and expand the range of light values. Tell me what you think.
NOTE: To keep comparisons as accurate as possible, all shots in this post are presented with no post processing except to downsize them for web use. Notice even my typical copyright is not present.
^


8 comments:
The results are quite amazing --especially Level 5. I wonder how these would compare to RAW images processed in Photoshop, Lightroom or Aperture.
I have no experience with raw or these programs. Perhaps someone else can shed some light on this question.
Gamin, thanks for making this experiment! My first experience with the Sony A700 is made in RAW (I always use RAW), and I wonder if the DRO adds anything. I guess it makes decisions on the darker areas of the picture that I prefer to make myself, even if that means I have to take time post-processing it all. You may want to see that on my blog: http://dfw-photo.blogspot.com. (And sorry for some typos in my previous attempt to react.)
Thanks for the comment DFW.
I have found with time that I, too, usually prefer to make these decisions even though I do not shoot in RAW.
How long does it take to draw a simple mask around the window area? How long does it take to brighten midtones within the inverse of that selection?
2 minutes. I've been fixing problems like this with Photoshop for 18 years and have yet to need "D-Range Optimizers". What a load of bunk.
How long does it take to draw a simple mask around the window area? How long does it take to brighten midtones within the inverse of that selection?
2 minutes. I've been fixing problems like this with Photoshop for 18 years and have yet to need "D-Range Optimizers". What a load of bunk.
Very useful exercise. The manual does not explain very well how this feature works; your photos made it clear. Since I mostly shoot JPEG's, this can be a real time saver. Thanks!
Post a Comment